

In my earlier post, I had created a basic HomeController and an AuthController.
When we ran the application there was enough logic to check if the user had been authenticated and if not he would be redirected to the login page.
Moving on, we'll now add a login page using which the user should be able to log in to the website.
Let's first create a class that would represent a request to log in...
public class LoginModel
{
    [Required]
    [DataType(DataType.EmailAddress)]
    public string Email { get; set; }

    [Required]
    [DataType(DataType.Password)]
    public string Password { get; set; }

    [HiddenInput]
    [ScaffoldColumn(false)]
    public string ReturnUrl { get; set; }
}
We'll add this in the Models folder in our solution.
We're using a few data annotation attributes to provide metadata about each property so that we can use some of MVC's HTML helpers to build the login form.
An important point to notice in the above code is that the ReturnUrl property has been decorated with the HiddenInput and ScaffoldColumn(false) attributes.
The HiddenInput attribute indicates that this property would be rendered as a hidden input element.
The ScaffoldColumn(false) indicates that later on in the razor view when we try to build the form elements this property should not be displayed as an input element.
We can now update the Login action of our AuthController as...
[HttpGet]
public ActionResult Login(string returnUrl)
{
    var model = new LoginModel
    {
        ReturnUrl = returnUrl
    };
    return View(model);
}
Notice that this action has been decorated with a [HttpGet] attribute.
Just like the existing Forms Authentication module, the URL of the protected resource that the user attempted to access is sent as a returnUrl query string parameter.
We need to ensure this is passed to us when the user submits the login form so it stored in the LoginModel and rendered as a hidden input on the page.
Let us now add the POST method in the AuthController would validate the credentials provided by the user and log him in.
[HttpPost]
public ActionResult Login(LoginModel model)
{
    if (!ModelState.IsValid)
    {
        return View();
    }

    // The user related information have been hardcoded for the time being.
    // In production, the hard coded values would be fetched from the database using the new ASP.Net Identity UserManager.
    if (model.Email == "admin@admin.com" && model.Password == "password")
    {
        var identity = new ClaimsIdentity(
            new[] {
                    new Claim(ClaimTypes.Name, "Sundeep"),
                    new Claim(ClaimTypes.Email, "sk@test.com"),
                    new Claim(ClaimTypes.Country, "India")
                    },
            "ApplicationCookie");

        var ctx = Request.GetOwinContext();
        var authManager = ctx.Authentication;

        authManager.SignIn(identity);

        return Redirect(GetRedirectUrl(model.ReturnUrl));
    }

    // In case user authentication fails.
    ModelState.AddModelError("", "Invalid email or password");
    return View();
}

private string GetRedirectUrl(string returnUrl)
{
    if (string.IsNullOrEmpty(returnUrl) || !Url.IsLocalUrl(returnUrl))
    {
        return Url.Action("index", "home");
    }

    return returnUrl;
}
For the time being, we have hard-coded the user credentials and claim-based data.
Later on, we'll see how the new ASP.Net Identity UserManager can be used to authenticate against user information stored in the database.
As can be seen in the code above, once the user credentials have been validated...
We create a
ClaimsIdentityobject that contains information (Claims) about the current user.
These Claims are persisted to the client inside the authentication cookie.
This means that you can add claims for frequently accessed user information rather than having to load it from a database on every request.Next, we obtain an
IAuthenticationManagerinstance from the current OWIN context. This was automatically registered for you during startup.Then we call
IAuthenticationManager.SignInpassing the claims identity. This sets the authentication cookie on the client.Finally, we redirect the user agent to the resource they attempted to access. We also check to ensure the return URL is local to the application to prevent Open Redirection attacks.
Finally, we'll also update the Login.cshtml view...
@model ASPNetMVC5Identity.Models.LoginModel

@{
    ViewBag.Title = "Log In";
}

<h2>Log In</h2>

@Html.ValidationSummary(true)

@using (Html.BeginForm())
{
    @Html.EditorForModel()

    <p>
        <button type="submit">Log In</button>
    </p>
}
We can also modify the Index view of the HomeController and add the user's claim information as...
@{
    ViewBag.Title = "Index";
}

<h2>This my HomeControllers Index view page!!</h2>
<h4>You need to be logged in to view this page.</h4>

<h5>Hello!! You are logged in as @User.Identity.Name</h5>
Last but not the least, we'll also add the code to log out to the AuthController is as follows...
public ActionResult Logout()
{
    var ctx = Request.GetOwinContext();
    var authManager = ctx.Authentication;

    authManager.SignOut("ApplicationCookie");
    return RedirectToAction("index","Home");
}
Again we obtain the IAuthenticationManager instance from the OWIN context.
This time calling SignOut passes the authentication type (so the manager knows exactly what cookie to remove).
We can now add a Login and Logout link to the website in the _Layout.cshtml page in the navbar section.
Furthermore, we'll also toggle between these based on whether the user is logged in or logged out...
 <div class="navbar-collapse collapse">
    <ul class="nav navbar-nav">
        @if (Request.IsAuthenticated)
        {
            <li>@Html.ActionLink("Logout", "Logout", "Auth")</li>
        }
        else
        {
            <li>@Html.ActionLink("Login", "Login", "Auth")</li>
        }

    </ul>
We can now run the application...
On the first run

Username and password entered
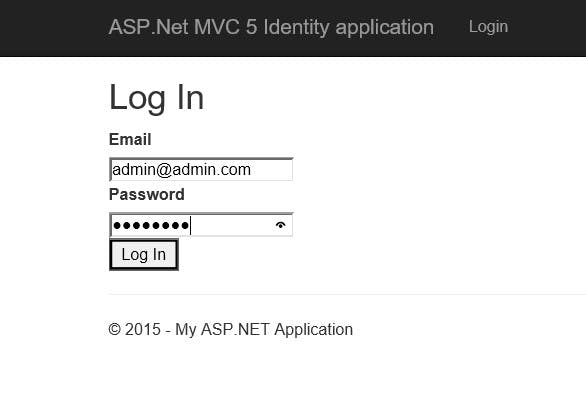
User logged in

Earlier in this article, we saw that the Claims identity was populated with other details like the country details of the user.
However, using the @User.Identity we could only access the name of the user.
If we wish to access the other details we can do so using...
public class HomeController : Controller
{
    public ActionResult Index()
    {
        var claimsIdentity = User.Identity as ClaimsIdentity;
        ViewBag.Country = claimsIdentity.FindFirst(ClaimTypes.Country).Value;

        return View();
    }
}
This value of the country in the ViewBag can now be accessed in the Home/Index.cshtml as...
<p>
  Hello @User.Identity.Name. How's the weather in @ViewBag.Country?
</p>
With this, we now have cookie-based authentication implemented in ASP.NET MVC using the new ASP.NET Identity libraries.
In the next post, we'll see how the new ASP.Net Identity UserManager can be used to get user information from the database.